When I washed someone else’s RV on time, it took a long time to scrub off all the dirt, grime, and bird droppings that had accumulated over the past several months. An RV carport could have helped this RV stay much cleaner and avoid some weathering issues.
In general, a permanent RV carport will cost you $2000 to $6000 to purchase and will take about 2 or more days to set up. It takes two people to set up and you will need to lift some heavy items. A concrete pad or holes for concrete and anchors will be needed.
Contents
There are many choices to choose from and different ways to install the carport, so prices and timelines in 2024 may vary a bit. RVs that are not used frequently tend to have issues if left out in the elements. It’s helpful to have an RV carport. A garage may cost too much; therefore, many people opt for a carport to protect their RV.
Which RV Carport Should I Get?
You will need to measure how tall, wide, and how long your RV is. This will help you decide on which RV carport will fit your RV best.
You will also need to consider if you want to park your RV and car both under the same carport. Then you need to make sure you have a couple of feet clearance on either side of the RV so you can open doors and or park both vehicles is needed.
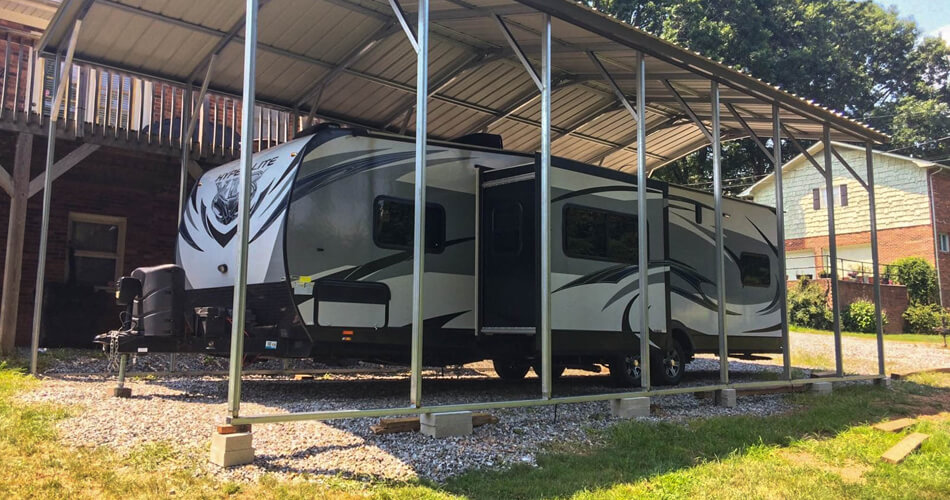
- RV Height. When choosing the carport for your RV, the height is likely the first thing to consider. A 10-foot-tall travel trailer can fit under a low-cost carport, while a Class A motorhome will need a taller and costlier carport.
- RV Width. The width is important for parking and your ability to enter and exit the RV without hitting the doors on the carport. Measure the width of the RV with both passenger and driver-side doors open. Then you’ll know about how wide you’ll need your RV carport to be. If you plan on parking your RV and your car under the carport, make sure to add the width of the car and the RV with doors open. Check how wide the doors swing open on the car as well to get an idea if both will fit under a certain carport.
- RV Length. To get full coverage for your RV, ensure the roof extends beyond the RV in the front and back.
- Weather Conditions. If there is frequent snowfall or rain, you may need a concrete pad and a sloped metal roof. In case of frequent winds, you may need to have a deeper foundation and more secure screws for the roof panels.
- Carport Color. You may want to match the color of the exterior of your home or garage that the carport is near. You may customize the texture and design of your carport so that it complements the exteriors of your house.
Also Read: RV Surge Protection
RV Carport Installation Preparation
Once you have finalized the type of carport you want, find out as much as you can about the steps needed to install it. Decide what type of pad you will need. You can install an RV carport onto a surface in several ways.
- Using a concrete pad;
- Digging holes for concrete anchor points;
- Place the carport on the ground using a rebar anchor;
- Place the carport on the ground without any tie-downs.
Then you can select the surface you want your RV to drive on. The more solid the ground the better. RV’s weigh a considerable amount and will sink into the ground as times goes by and as water penetrates the ground.
Selection of the type of ground
Select a level surface for best results. There are several types of surfaces that most people choose when using a carport:
Gravel Pad: For a cheaper option you can lay a layer of gravel on the ground. According to nodakangler.com, you should use .75 to 1.5 inches of crushed rock when laying a gravel pad for your RV.
Concrete floor: These floors are great when it rains frequently. A concrete floor is helpful when installing and securing a carport. A carport will stay in place better with a firm base. Bare ground on the other hand doesn’t always handle rainy conditions well.
Pavers: When installed with proper dirt compaction and a layer of gravel, pavers can work well as a solid surface for an RV.
Level the ground
It’s best to make double sure your ground is firm and flat before starting installation. A dirt compacting tool can help you ensure a solid surface before installing your pad. Sometimes you’ll need to level the ground a bit. Try to ensure it’s as flat as it can be, so puddles don’t occur.
Use Gravel if Needed
In some cases, bare ground will work. However, to avoid the ground from sinking in, use crushed granite as needed to prevent erosion and add traction.
Using Pre-fab Carport Kit
If you plan on doing the installation yourself, you can buy a carport and install it using a carport kit. You can watch the video above for step-by-step instructions that you can expect to you will need to do so you can complete the installation of your RV carport.
- Determining the length of the frame – It is very important to determine the length of the frame correctly as it plays a great role in the stability of the entire Ideally, the length of the frame should be 1 foot less than the length of the roof of the carport;
- Assemble the base rails – Once you get the appropriate ground for carport installation, the second step is to assemble the base rails. These act as the foundation of the carport;
- Anchor the base rails;
- Assemble the trusses;
- Attach the trusses to the base;
- Attach sheet metal to the frame.
Gaming on the Go: Enjoying Arena Breakout Infinite from the Comfort of Your RV
Playing Arena Breakout Infinite in an RV takes the gaming experience to a whole new level of convenience and enjoyment. The flexibility of an RV allows you to set up your gaming station anywhere, whether you’re nestled in a serene forest or parked by a picturesque lakeside. With modern RVs equipped with reliable Wi-Fi and ample power sources, you can enjoy seamless gameplay without worrying about connectivity issues. The cozy, personalized space of an RV enhances the immersive experience, making every PVP battle in Arena Breakout Infinite feel like an adventure. Whether you’re on a road trip or living the nomadic lifestyle, browsing Arena Breakout Infinite Wiki in an RV combines the thrill of the game with the freedom of the open road.
Build A Custom RV Carport
A custom RV carport can save you a lot of money but you can also end up spending more than an RV kit fairly easily. Check out plan and the materials you will need. Remember the cost of lumber may be prohibitive, depending on how big the structure is.
1. Building Foundation
- Lay concrete with post anchors or dig the holes for to place the posts and pore concrete in each hole.
- Depending on how long and how heavy the roof will determine how long your concrete pad is or how many holes you need to dig.
- Equally spaced your posts holes. About 8 ft apart. (Check local regulations). You’ll likely need 8 or more posts depending on how thick your posts are and how long your carport is. Check for RV carport plans online.
- Set the posts fasteners to the concrete. You might need to check your local city regulations to see if your plans meet the local regulations.
2. Placing the Beams
- You might opt for 16 ft beams if you have a tall RV. These should be of the same height and unless you plan to have the roof slant down on one side only. To provide a slant to the roof make one side of the carport post longer and the other side shorter.
- Fasten the beams to the footing hardware.
- Insure the the beams are aligned correctly.
3. Building the roof
- Fasten the rafters to the side beams: All the rafters should be equidistant from each other.
- Fasten the plywood roof boards to the rafters or use a steel roof: Fasten the plywood boards over the rafters in such a way that you have at least a 6-inch overhang on the front and back side of a carport.
- Check the stability of the structure: Once the roof is in place, you need to check the stability of the structure and ensure that it is solid.
4. Finishing the job
- Caulk the plywood roof seams: Cover the roof with synthetic paper to make it waterproof.
- Fasten shingles on top of the plywood roof elements: Use three-pad shingles to add a protective layer on the carport roof.
- Reinforce the joints with metal plates: You should use metal plates to attach rafters, beams and plywood roofs. This will further strengthen the structure.
- Stain the wooden elements: It is always good to paint the exposed wooden parts with a good quality stain. It increases its lifespan.
If you are not able to install an RV carport by yourself, you may contact any service provider that provides for an RV carport install.
Cost of an RV Carport
The price of your carport can vary greatly. A smaller RV carport can cost about $2500, while a large one can cost up to $5000.
Shop around for the best deals. Some websites will have much higher prices and others will be much less.
Look at all the features and if it’s the kind that will best suit your needs. Some RV kits will take more time, be better structurally sound, and come with better warranties.
Check at least three places before making any decision. Then wait about a week before making a final decision to make sure you don’t have buyers remorse. Thoughts, plans, and new information can change your idea of what’s the best thing to do for you.
Final Thoughts
Getting an RV carport can be an effective way to keep your vehicle in the best condition for years to come. Whether you choose to buy a kit or do it yourself, you can create a value-added area of your home that will save you time and money in the future with your RV.
Having a good carport is important if you plan to use your RV in the long run. It helps protect your RV from harsh weather and falling objects. This also keeps the RV in good condition and increases its resale value.
Installing an RV carport yourself or getting some help is a great idea to the longevity of your RV and for peace of mind.